Page intro field - use this for 1 to 2 sentences to explain the page. Always displays at the top of the page. You can't add links to the page intro or formatting. Does not show on bespoke content pages.
RTE (Rich Text Editor) functions:

Format paragraph dropdown options (headings, action button and paragraph highlight)
Heading 2 example (H2)
Always use Heading 2 as the first heading on a page (page title is a heading 1). You don't need a heading for 'Introduction' - users know the first paragraph is the introduction.
Don't use Heading 3 or 4 as the first heading style - these are both subheadings.
You don't need to bold the word as well as select the heading format.
Heading 3 example (H3)
Subheading of a heading 2.
Heading 4 example (H4)
Subheading of a heading 3.
Action button
Create a hyperlink, highlight text and select 'paragraph (action button)' from format options dropdown.
Can also insert an action button via the macro functionality.
Example action button:
Paragraph highlight
Write 1 to 2 sentences of text, highlight then select 'paragraph (highlight)' from format options dropdown.
Text options (bold, italic, underline, strikethrough and alignment)
- Underline - do not use > only hyperlinks should be underlined for accessibility.
- Bold text - use for pulling out 1 to 5 key words.
- Italic - use to emphasise 1 to 2 words.
Strikethrough
Text alignment
Always left align text for accessibility and people with cognitive disabilities. It's OK to right align images.
Lists
Bullets:
- Default is round bullets (first ident level).
- Circle used for the first indented sub-bullet.
- Square is used for the second level of indented sub-bullets.
- Circle used for the first indented sub-bullet.
- Bullet 1
- Sub-bullet
- Sub-bullet
- Sub-bullet
- Bullet 2
- Bullet 3
Numbers:
- Number 1
- Number 2
- Number 3
- Number 4
Letters:
- letter 1
- letter 2
- letter 3
OR
- letter 1
- letter 2
- letter 3
Roman numerals:
- Roman 1
- Roman 2
- Roman 3
OR
- Roman 1
- Roman 2
- Roman 3
Greek - do not use:
- Greek 1
- Greek 2
- Greek 3
Hyperlinks
Use descriptive links where words are the hyperlink rather than a pasted URL. A descriptive link provides the user with the context of where the link is taking them.
- Bad hyperlink: Click www.greatercambridgeplanning.org/localplan for more details
- Good hyperlink: Find out about the Greater Cambridge Local Plan.
Don't use generic phrases such as 'click here' or 'here' as the hyperlink. Not all users click and it doesn't describe where the link is taking the user.
Aim to link 3 to 5 words rather than a whole sentence.
Read the full hyperlink guidance on citynet.
There is also a button to remove hyperlinks.
Anchor (jump links)
Used as jump links to direct the user down the page to a subheading. E.g. as used at the top of the corporate plan page.
Only use within the same page. Not recommended to use as a jump link from another page to halfway down another content page as confusing for the user.
- Select the heading you want to link to.
- Select 'Anchor' then type in an ID - either a number or a 1 word description on the heading e.g. 'macros'.
- Write out hyperlink to link to anchor. Highlight word and select 'Hyperlink' in usual way.
- At the top right of the hyperlink box select your anchor word from the list.
- Select submit.
- Publish the page and check anchor works.
- Any headings linked as an anchor will have the anchor bookmark icon next to them.
Example anchor link:
Images
Edit your image to your desired width, height and size before uploading to umbraco.
- No more than 1000px wide/200kb in size to keep the page from loading quickly.
- Add alt text to all images for accessibility.
Example full-width image (900 x 300px):

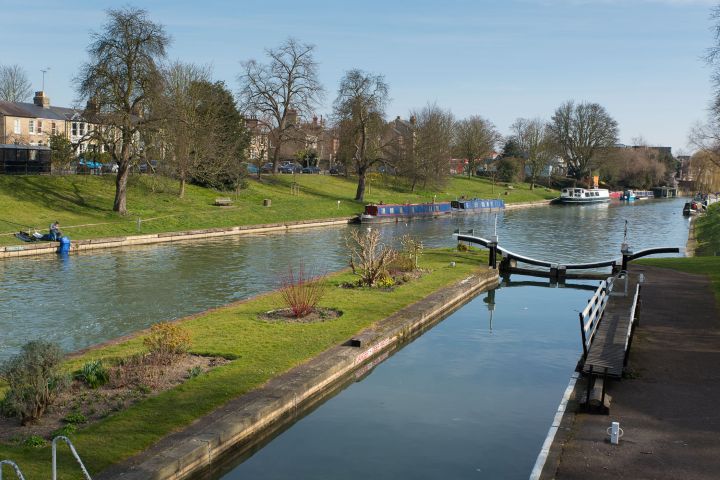
Example full-width image (720 x 480px - 3:2 ratio):
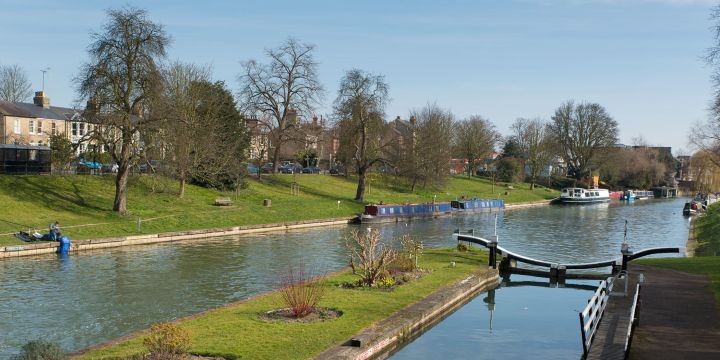
Example full-width image (720 x 360px - 2:1 ratio):
Example image (600 x 400px - 3:2 ratio). Not full width of the page so centrally aligned:

Example right-aligned rectangular image wrapped with text (600 x 400px - 3:2 ratio):
Lorem ipsum dolor sit amet, consectetur adipiscing elit. In elementum justo a urna sodales, vel laoreet justo rhoncus. Suspendisse convallis nisl quis pellentesque ornare. Donec quis ipsum dignissim, sollicitudin orci in, feugiat mi. Nulla at accumsan lectus. In volutpat, sapien at imperdiet fermentum, metus lacus feugiat justo, vitae feugiat dui ligula a quam. Phasellus rhoncus, sem eget tempor tincidunt, nibh felis efficitur diam, sed pulvinar sem sem at velit. Duis sed diam justo. Integer risus ex, convallis ut eros nec, tempus interdum nunc.
Example right-aligned square image wrapped with text (300 x 300px - 1:1 ratio):

Lorem ipsum dolor sit amet, consectetur adipiscing elit. In elementum justo a urna sodales, vel laoreet justo rhoncus. Suspendisse convallis nisl quis pellentesque ornare. Donec quis ipsum dignissim, sollicitudin orci in, feugiat mi. Nulla at accumsan lectus. In volutpat, sapien at imperdiet fermentum, metus lacus feugiat justo, vitae feugiat dui ligula a quam. Phasellus rhoncus, sem eget tempor tincidunt, nibh felis efficitur diam, sed pulvinar sem sem at velit. Duis sed diam justo. Integer risus ex, convallis ut eros nec, tempus interdum nunc.
Macro - Insert Accordion
Accordions are the drop-down content that open and close. Also called 'collapsible content'.
There are 2 ways to set up the accordions. The other way is via editing the source code - see further down the page.
To set this way up:
- navigate to the item listed in the left menu above the Recycle Bin called 'Accordion (collapsible content list)
- select the 3 dots next to the menu item and 'Create' > 'Collapsible item'
- Set up your accordion content and save that - the title is the dropdown title shown on your page.
- Note that the accordions headings are all H3s so any subheadings in your content need to be H4.
- Navigate to your page where you want to add the accordion.
- Select 'Insert Accordion' from the macro list and select the item(s) you just created.
Example accordion item:
Lorem ipsum dolor sit amet, consectetur adipiscing elit. Sed ac mollis lectus. Duis ut sollicitudin ipsum, a vulputate felis. Phasellus lobortis laoreet arcu, id tempus magna vulputate in. Phasellus bibendum id velit sed sodales. Nam condimentum metus dui, at ullamcorper nibh faucibus nec. Morbi ullamcorper, velit fringilla maximus dictum, dui tortor elementum magna, vestibulum accumsan turpis ligula a est. Fusce ultrices pulvinar eros, in euismod metus accumsan vitae. Maecenas dapibus turpis non tortor lobortis, eget convallis enim faucibus. Praesent consequat ipsum eu placerat efficitur.
Macro - Insert Action Button
Can either create an action button via the Formats dropdown or via this macro.
'Description Label' field on macro is text that displays on the button.
Example action button:
Macro -Insert Call to Action
Full page width call to action - on desktop view is normally full width of the screen however smaller width here as included in an accordion. See another CTA at bottom of page and above the contact us box to see how it normally looks on desktop.
Only includes text and not images.
Can't edit the button label for 'Read more' or add links or text formatting.
Link to an external webpage or internal page on the website.
Example CTA:
CTA title
CTA summary text - Lorem ipsum dolor sit amet, consectetur adipiscing elit. Cras vehicula nibh et sem aliquam consequat. Nulla dictum ex non suscipit placerat. Proin eleifend massa felis, in condimentum turpis convallis ut.
Macro - Insert Deflection Map
Functionality that isn't currently used. In theory can be used to connect to Alloy to show streets issues that have been reported on a map on a webpage. Our streets forms that are integrated with Alloy all show a map that displays jobs already raised.
E.g. how HDC are using it on their fly-tipping page:
Was very complicated to set up before. Have asked 3C Digital for some instructions on how to set up and to check if it can be used. Would need to work with the streets team to set up as need Alloy codes etc.
Macro - Insert Embedded Video
Embed a video from YouTube URL. Video is always full-page width.
Example video:
Macro - Insert Esri Map
Insert a map via it's URL. The ICT GIS team create and update our maps for us.
Map markers/key are created separately under 'Map markers' in the umbraco menu.
Example map (without the key/map markers):
Example map (with a key/map markers):
Multi-storey car parks
Street-level car parks
Park & Ride car parks
Other car parks (not council-owned)
Macro - Insert FOI Disclosure list
Previously used by the Info Gov team to display FOI details on our website. No longer used.
Macro - Insert Form
Can embed an umbraco form (built via Forms tab) onto a page. Can't embed other types of forms e.g. IEG4.
Form example:
Macro - Insert parking data
Links to our multi-storey car park space data provided by county.
Example parking data for Grafton East and Grand Arcade:
Grafton East
There are spaces. The car park is full.
Grand Arcade
There are spaces. The car park is full.
Macro - Insert tree work orders
Used on the Comment on our planned tree works page to display tree work order pdfs and dates available for comments.
Media uploaded via Trees folder in media library and not via page. Automatically shows on the page where this macro is added.
Snippet insert google map with KML
Only used on the couple of remaining pages that still use a google map. All maps being replaced with Esri maps.
Snippet insert html
Used on pages with integrated streets forms. The map on the forms doesn't work if javascript is turned off. This changes the page so if javascript is turned off the form link is hidden and instead a phone call number displayed asking them to call us to report the issue.
Macro - Timer
Can't get this to work!
Can be added on landing and content pages anywhere on the page. Looks a bit clunky. Can't add links or images.
There's also another timer that can be added to landing pages and their children found under Home > Countdown Timer.
Opening and closing text is optional.
Example timer:
Horizontal line
Use to break up content. For example, on an alert when detailing an update on a new date following the original update date.
Example line:
Collapsible content / accordions/h3>
Can also created collapsible content via a macro - see above.
The alternate way to create collapsible content is to edit the source code/HTML (button with <>). See an example of this being used on the Contact us page.
Example HTML that would be in the source code. Bold text relates to accordion set up and titles/ normal text is body content:
<div class="accordion-group">
<h3 class="accordion-header">Council Tax</h3>
<div class="accordion-content">
<p>Changes in circumstance or applying for discounts or exemptions for Council Tax can be done online; so please choose from one of the following options to tell us about a change or to make an application.</p>
<ul>
<li><a href="https://espws.necsws.com/ords/pwslive/call_initial_apex_page.nes_selfsrv?service=CAHOMEPAGE&la=CAM&options=HOME">Download a copy of your bill through the Council Tax portal</a> (My Account), which can be used for your own records or to provide to third parties as proof of residence</li>
<li><a href="https://forms.cambridge.gov.uk/COUNCILTAXEXEMPTION/launch">Apply for a Council Tax exemption</a></li>
<li><a href="https://forms.cambridge.gov.uk/COUNCILTAXREDUCTIONAPPLICATION/launch">Find out about discounts or disregard status and apply online</a></li>
<li><a href="/get-money-off-your-council-tax-bill">Get money off your Council Tax bill,</a> for example if you are a student, or you live alone</li>
<li><a href="/register-for-council-tax-or-update-your-details">Tell us if you have moved house</a> through our online portal, even if you have moved overseas</li>
<li><a href="/my-account">View your Council Tax account</a>, find out ways to pay, and get information about refunds</li>
<li><a href="https://forms.cambridge.gov.uk/COUNCILTAXREFUND/launch">Request a refund through our online form</a></li>
<li><a href="/pay-your-council-tax">Make a payment</a> through your account or through our payments page</li>
</ul>
</div>
<h3 class="accordion-header">Benefits</h3>
<div class="accordion-content">
<p>Most benefits are now managed through Universal Credit. Our <a href="/benefits">benefits webpage</a> provides links to benefits services and advice on benefits.</p>
<p>Our benefits webpage explains what support is available as well as providing the links to enable you to apply. Information and links to apply for a council tax reduction can also be found on these pages.</p>
<p>If you do need to apply to Cambridge City Council for benefits, including council tax reduction, this can <strong>only</strong> be done online using the link highlighted above.</p>
</div>
Example frontend of the source code for the accordions (on the webpage this content is included in collapsible content):
Collapsible content example 1
Changes in circumstance or applying for discounts or exemptions for Council Tax can be done online; so please choose from one of the following options to tell us about a change or to make an application.
- Download a copy of your bill through the Council Tax portal (My Account), which can be used for your own records or to provide to third parties as proof of residence
- Apply for a Council Tax exemption
- Find out about discounts or disregard status and apply online
- Get money off your Council Tax bill, for example if you are a student, or you live alone
- Tell us if you have moved house through our online portal, even if you have moved overseas
- View your Council Tax account, find out ways to pay, and get information about refunds
- Request a refund through our online form
- Make a payment through your account or through our payments page
Collapsible content example 2
Most benefits are now managed through Universal Credit. Our benefits webpage provides links to benefits services and advice on benefits.
Our benefits webpage explains what support is available as well as providing the links to enable you to apply. Information and links to apply for a council tax reduction can also be found on these pages.
If you do need to apply to Cambridge City Council for benefits, including council tax reduction, this can only be done online using the link highlighted above.
CTA title
CTA summary text - Lorem ipsum dolor sit amet, consectetur adipiscing elit. Cras vehicula nibh et sem aliquam consequat. Nulla dictum ex non suscipit placerat. Proin eleifend massa felis, in condimentum turpis convallis ut.